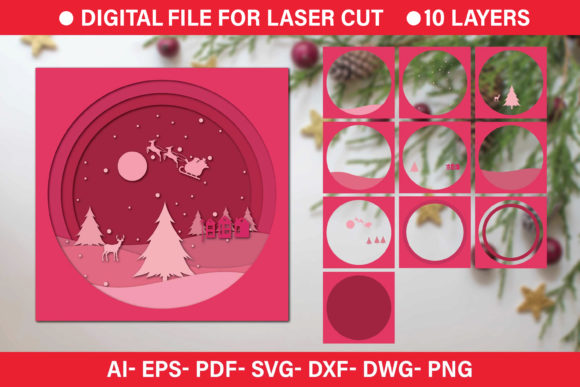
Christmas Paper Cut 3D SVG Files: What You Need to Know Before You Start
If you’ve been exploring festive craft projects, you’ve likely come across Christmas paper cut 3D SVG files. These layered vector designs let you create stunning dimensional art—think snowflakes, nativity scenes, Santa sleigh silhouettes, or intricate winter village shadow boxes. When used correctly, a well-made file can turn a few sheets of cardstock into a showstopping decoration or gift. But the path from download to finished piece is full of small pitfalls that can waste time, money, and materials. Understanding what to look for—and what to avoid—can make the difference between a rewarding project and a frustrating pile of misaligned paper.
What a Christmas Paper Cut 3D SVG File Actually Is (and Isn’t)
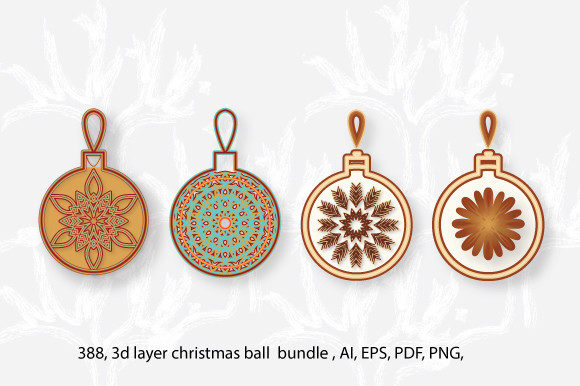
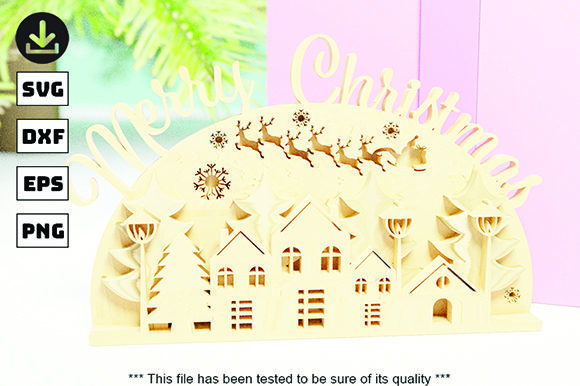
A Christmas paper cut 3D SVG file is a vector-based design that uses multiple layers of cut paper to create depth. Each layer typically represents a different distance from the viewer—background, midground, and foreground elements are cut separately and then stacked using foam spacers, adhesive dots, or a shadow box frame. The SVG (Scalable Vector Graphics) format contains precise cut lines, score lines, and sometimes built-in registration marks to help you align the layers during assembly.
This is not a printable file meant for an inkjet printer, nor a single-layer silhouette. It’s also not the same as a craft kit with pre-cut pieces. The file gives you control over paper color, size, and finishing touches, but it demands that you understand your cutting machine (Cricut, Silhouette, or similar) and the physical properties of the paper you choose. Many beginners mistake SVG for a one-click solution, only to discover that the software, cut settings, and assembly require careful attention.
1. Choosing a File That Looks Good in the Preview but Falls Apart on Your Mat
The biggest mistake people make is judging a file solely by its thumbnail. A beautiful rendered image can hide problems like overly thin lines, broken paths, or layers that are not nested inside the intended cut boundaries. When you import such a file into Design Space or Silhouette Studio, the software may interpret those issues as separate unconnected elements, leading to incomplete cuts or unexpected weeding.
How to avoid it: Look for files that come with a detailed listing of layer counts, dimensions, and suggested materials. Reputable designers often include a sample cut photo showing the finished piece from different angles. If the product page only shows a digital render without any real-world photo, consider it a red flag. Before buying, check reviews or ask the seller about the file’s construction. A premium file will have clearly grouped layers, proper welding of overlapping shapes, and a logical cutting order.
2. Overlooking Layer Alignment and Assembly Instructions
A 3D paper cut requires each layer to line up precisely. Many novice crafters assume the SVG will automatically register everything correctly inside their cutting software. But some files are created with each layer placed on a separate artboard or exported as individual SVG files, leaving you to figure out the stacking order. Without clear numbering or visual guides, you might glue the star behind the tree or offset the silhouette by a few millimeters.
How to avoid it: When evaluating a file, confirm that it includes either a PDF assembly guide, a numbered layer diagram, or a video walkthrough. The best SVG files also include a “reference” layer that shows the complete assembled design, so you can check your placement as you stack. If you are buying from a marketplace like Etsy or Creative Market, read the description carefully—if the listing says “no instructions” or “basic cut file only,” be prepared to create your own alignment method using grid marks or a light table.
3. Using the Wrong Material for the Layer Depth
Christmas paper cut 3D files often rely on varying paper thicknesses to achieve the dimensional effect. A typical design might use 65 lb cardstock for most layers and 80 lb or 110 lb for the front detail layer to make it stand out. If you use lightweight printer paper for all layers, they will sag and lose the crisp shadows that give the piece its 3D appearance. Conversely, using heavy cardstock for every layer can stress your cutting machine and cause uneven cuts, especially on intricate details like the branches of a Christmas tree.
How to avoid it: Read the material recommendations provided by the designer. If none are given, start with a midweight cardstock (around 80 lb / 216 gsm) and test a small piece before committing. Adjust your blade depth, pressure, and speed according to the paper weight. Many designers now include a material settings chart inside the download folder—use it as your starting point and fine-tune from there.
4. Downloading Format Mismatches and Software Incompatibilities
A common misunderstanding is that all SVG files work identically across all cutting platforms. In reality, a SVG exported from Adobe Illustrator may contain strokes, gradients, or complex clipping masks that your home cutting software cannot render. When you upload the file, those elements may appear blank, cause the software to crash, or force you to manually simplify the design. This is especially prevalent with older SVG versions or files that were not optimized for machine cutting.
How to avoid it: Choose files that specifically state “Cricut compatible,” “Silhouette Studio compatible,” or “optimized for home cutting machines.” Many designers now offer a “clean SVG” with all strokes converted to paths and no embedded images. If you are on a budget and found a free file, open it in a vector program like Inkscape first to inspect for issues. Removing unnecessary elements before import can save you hours of troubleshooting.
5. Ignoring Commercial Use Licensing
If you plan to sell finished paper cuts—for instance, at holiday markets or on Etsy—you need to verify the license of the SVG file. Many Christmas paper cut 3D SVG files are sold for personal use only, and using them commercially without permission can lead to a takedown notice or even a legal claim. Some designers offer a separate commercial license for a small fee, while others include it in the product price. The mistake is assuming that “buying” a file automatically grants resale rights.
How to avoid it: Read the license terms before clicking purchase. Look for keywords like “commercial use allowed,” “small business license,” or “physical product resale permitted.” If the terms are vague, contact the seller directly. Ethical designers appreciate the question and will clarify. Keep a record of your license receipts—store them in a folder alongside your SVG files so you can prove your rights if needed.
What to Check Before You Buy or Download
- Layer count and complexity. A 25-layer winter village scene will take significantly more time and material than a 4-layer simple tree. Be honest about your skill level and available patience. Beginners should start with designs that have 5–8 layers.
- File format availability. Ensure the bundle includes not just SVG but also DXF (for Silhouette users) and PDF (for backup instructions). Some designers also include PNG for hand-cutting or light box use.
- Scale flexibility. Can you resize the file without losing the thickness ratios? Some layered designs scale poorly because the spacing between layers is tied to the original size. Look for files that mention “scaleable” or “adjustable” in the description.
- Cut test availability. A few designers offer a small free sample file (like a single ornament) to test your machine and material before you buy the full set. Take advantage of these—they are the best indicator of file quality.
- Designer reputation. Search for the designer’s name in craft forums or Facebook groups. Frequent positive mentions from other crafters are a strong sign of reliable files and good customer support.
Practical Advice for a Smooth Project
Once you have a quality file, take the time to prepare your workspace. Use a cutting mat with good tack, and a brayer to press the paper firmly. Cut a test piece of each layer using scrap cardstock first—this is not a waste of material, but an investment in a flawless final result. Check alignment by holding the test layers up to a light or using a light pad. Adjust your machine settings if the cuts are too shallow or too deep. Many experienced crafters keep a log of successful settings for different paper types, making future projects quicker.
When assembling, work from the back layer forward. Use strong but thin adhesive foam squares (1–3 mm thick) to create the 3D gap between layers. Avoid thick foam that makes the piece bulge, and avoid liquid glue that can warp thin paper. Place your shadow box or frame only after the entire stack is dry and flat. If your final design is meant to be backlit with LEDs, consider cutting a window in the backer board and using vellum or translucent paper for the front layer to diffuse the light evenly.
Remember that a Christmas paper cut 3D SVG file is a tool, not a magic wand. The skill lies in the preparation, the material choice, and your patience during assembly. Even a world-class file can underperform if rushed. But by sidestepping the common mistakes and verifying your choices early, you can produce a layered masterpiece that captures the holiday spirit and makes everyone ask, “Where did you buy that?”
Whether you are a hobbyist looking for a new tradition, a small business owner expanding your holiday inventory, or an educator planning a hands-on winter project, the right file—handled with care—can deliver results you’ll be proud to display or sell. Take the time to evaluate, test, and assemble thoughtfully, and your Christmas paper cut will become a cherished part of the season.